
AS2 Adapter for Microsoft BizTalk
Requirements: /n software Adapters for Microsoft BizTalk
Introduction
The /n software Adapters for Microsoft BizTalk include fully-managed .NET Adapters that seamlessly integrate with the BizTalk Messaging Pipeline. The /n software Adapters extend the features of BizTalk with advanced Internet communications and secure messaging capabilities.
There are many different BizTalk adapters currently supported: AS2 Adapters for EDI communications, FTPS, FTP, SFTP, SSH, Email adapters, etc. These adapters have completed the official adapter certification program (administered by Unisys) established by Microsoft for BizTalk server, which tests for scalability and interoperability with Microsoft BizTalk Server.
This guide will focus specifically on the AS2 adapter, which is used to both send and receive EDI documents. Before you continue reading, I recommend that you go ahead and download the product and follow along with me through the tutorial.
Contents
- Adapter Installation
- HTTP Endpoint Configuration
- Receive Location Configuration
- Send Port Configuration
- Conclusion
Adapter Installation
Before installing you should stop the BizTalk host instance and close the BizTalk Administration Console. After you run the setup application, all of the necessary files will be installed on your system. The adapters will automatically be added to the BizTalk Administration Console, so we can begin using them in send ports and receive locations. If you open the BizTalk Administration Console and create a new receive location or send port, you'll see that the /n software AS2 adapter is now available as a transport type.
Note: It is necessary to restart IIS after installation so the HTTP endpoint can be used.
HTTP Endpoint Configuration
Since the AS2 receive adapter must receive requests over HTTP, an HTTP receive application (normally just an aspx page or module) must be setup under IIS to forward AS2 requests to BizTalk. A sample is included in the aspx subfolder of the installation directory. This sample can be used as is, or be modified to suit your site requirements. In this article we will use the project as is.
Before we can begin receiving AS2 messages using the HTTP endpoint project, we will first need to compile it. To do this, you can select the "AS2 Receiver HTTP EndPoint (C# Project)" link from the BizTalk Adapters start menu group. Alternatively you can open this project directly from the aspx directory of the installation. We will use the C# project in this tutorial, but a VB.NET project is also included.
After opening the project simply build the website. If you are using Visual Studio 2005 or later you will need to let the Visual Studio Conversion Wizard complete as the HTTP EndPoint project is written in Visual Studio 2003. After successfully building the website we will need to make sure the appropriate permissions are given to the virtual directory which points to this web application. During installation a virtual directory called ipbaspx24-cs was created unless the option was not checked (it is checked by default).
For any adapter to be able to fetch its configuration from the SQL databases used by BizTalk Server, the application under which the adapter runs must have proper security access to the SQL server. Normally, BizTalk Server takes care of this when you create a new host and set the user identities for the various groups like "BizTalk Isolated Host Users". BizTalk Server will make sure that the user identity you supply has the necessary permissions to access SQL Server. However, this does not apply for applications running under Internet and Information Services (IIS) such as ASP.NET. In order to get the necessary permissions to adapters hosted on web sites, use the following process:
- Open MMC either by right-clicking "My Computer" and selecting Manage, or by opening the console and typing "mmc".
- Expand the Services and Applications node. Expand the Internet and Information Services (IIS) Manager node.
- Right click the Application Pools node and select New -> Application Pool. Give the new application pool a name and click "OK".
- Right click the application pool you just created and select Properties. Go to the "Identity" tab and give the application pool an identity that is a member of the BizTalk Isolated Host Users group. Click "OK."
- Expand the Web Sites node. Expand the Default Web Site node (or the site under which your application is hosted).
- Right click the page and select Properties. On the "Virtual Directory" tab, select the application pool you just created from the drop down menu beside "Application Pool". Click "OK." The HTTP EndPoint now has the necessary access rights for the adapter to work.
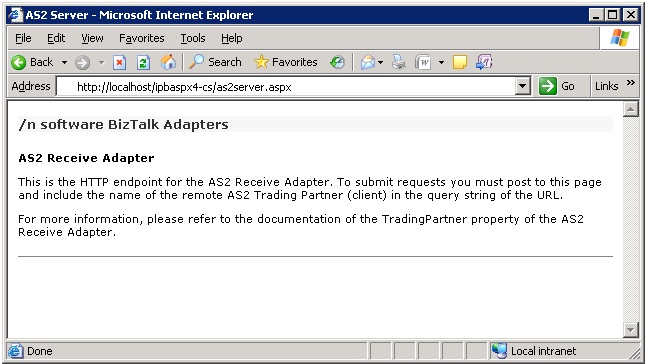
To verify that the HTTP EndPoint project is ready to receive incoming AS2 messages you can open the AS2Server.aspx page in a web browser. So if you navigate to "http://localhost/ipbaspx24-cs/as2server.aspx" you should see:
Receive Location Configuration
In this tutorial we will be using the /n software BizTalk AS2 Adapter in conjunction with the standard File adapter to send and receive messages over AS2. For the purposes of this demo we will create a file structure like so:
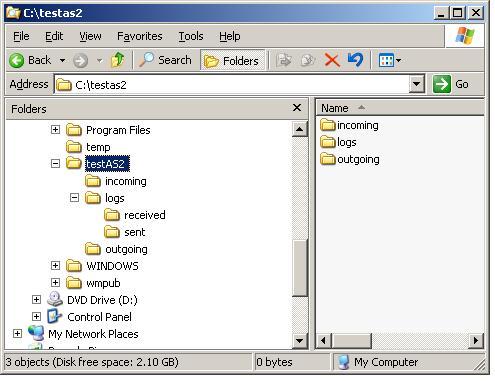
As you can see we have a directory for files that are outgoing (to be sent) and files that are incoming (received) as well as a logs directory for both incoming and outgoing messages.
Next we will create a new receive location named "testAS2.Receiver" with a transport type of "nsoftware.AS2 2024". Most of the default values are valid and will not need to be changed, but we will need to specify some additional information to prepare to trade. Below is a list of properties and the values which we will supply for this tutorial. We will be using AS2 identifiers of TestAS2Sender for the sending party and TestAS2Receiver for the receiving party. We will use a test certificate which you can obtain here.
AS2 Site URL
This will be the name of the virtual directory where the HTTP EndPoint project is hosted followed by "as2server.aspx". This will be "http://localhost/ipbaspx24-cs/as2server.aspx".
When providing a URL to your trading partner for their use it should follow this format: "http://hostname/ipbaspx24-cs/as2server.aspx".
Log Directory
This is the location where received logs will be generated. We will set this to "c:\testas2\logs\received".
Receiving Partner
This is the identify of the AS2 receiving entity. This will always be your identity. So we will set this to TestAS2Receiver.
Trading Partner
This is the identify of the AS2 sending entity. This will be your trading partners identity. In this case the value will be TestAS2Sender.
Encryption Cert
This will be your digital id which will be used to decrypt incoming messages. If you place the cursor in the textbox a button with ellipses will be visible.
Clicking this button will open the Certificate Selector Dialog.
Select the PFX Store tab and browse to the digital id you'll be using. In this case we will be using
the "test.pfx" file mentioned above. Specify the pass phrase as "test" and click the Open button. You will see the subject of the certificate (CN=Test AS2) listed below.
Highlight the subject by clicking on it and then click the OK button. The Certificate Selector Dialog should look like this:
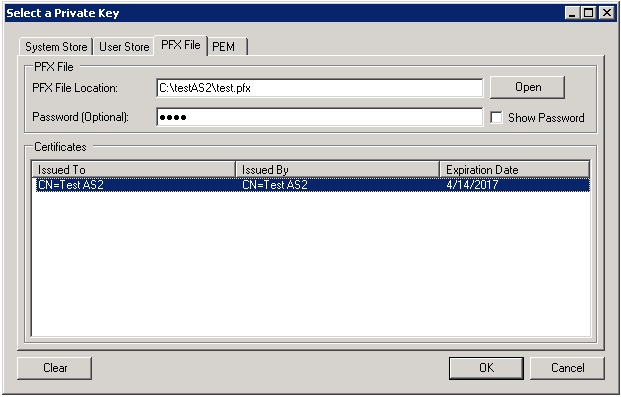
Once closed you should see the value of the Encryption Cert property as CN=Test AS2. You will need to furnish your trading partner with the corresponding
public certificate so that they will be able to encrypt messages to send to you. This also applies to the MDN Signing Cert property so they can verify your
signature.
MDN Signing Cert
This is the digital id used to sign MDNs that are returned to the sender. This will typically be the same digital id as the one specified
for the Encryption Cert property. We will repeat this same process as above to select test.pfx.
Signer Cert
This is the public certificate obtained from your trading partner. This is used to verify the signature of incoming messages. In this tutorial
both the sender and receiver will be using the same digital id and corresponding certificate so we will again place the cursor in the text box and click the
ellipses button to open the certificate selector dialog. You will notice this time that the PFX Store option is not available. This is because this time
we need to load a public certificate not a digital id.
Select the Public Key / Certificate tab and browse to the test.cer file. Then click the Open button to load the certificate. The Certificate Selector
should look like this:
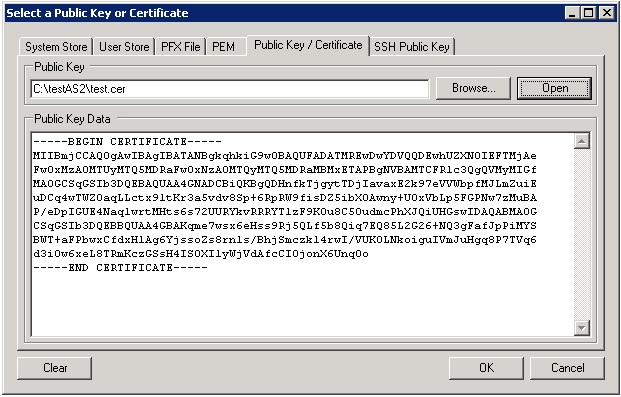
Once closed you should see the value of Signer Cert as C:\testAS2\test.cer.
Finish
We have now successfully specified the certificate and digital ids the AS2 Receive Adapter will use, as well as the appropriate virtual path
and AS2 Identifier information. At this point click OK to close the adapter properties window. The URI of your receive location should be:
AS2://ipbaspx24-cs/as2server.aspx?AS2From="TestAS2Sender"&AS2To="TestAS2Receiver".
You should now create a new Send port of type File. We will name this send port testAS2.Receive.File. The destination folder for this send port should be C:\testAS2\incoming. We will specify a filter of BTS.InboundTransportLocation == AS2://ipbaspx24-cs/as2server.aspx?AS2From="TestAS2Sender"&AS2To="TestAS2Receiver" to correspond with the receive location we just created.
Send Port Configuration
We will now create a new send port named "testAS2.Sender" with a transport type of "nsoftware.AS2 2024". As before most of the default values are valid, and we will only change the values of the properties listed below.
AS2 From
This is the sending party's AS2 Identifier. In all cases you will be the sender so this will be your identifier. We will specify this as TestAS2Sender.
AS2 To
This is your trading partner's AS2 Identifier. Since we are trading with the receive location we just set up we'll specify TestAS2Receiver here.
Log Directory
This indicates the location where all of the sent logs will be generated. We will use the value "c:\testas2\logs\sent".
MDN To
In order for an MDN to be requested a value must be supplied to this property. The accepted format is that of an e-mail address, but will not be used in any way other than to indicate
that an MDN is requested. We will use the value "test@test.com". By default the MDN Options property value tells the adapter to request a synchronous MDN.
URL
This is your trading partner's URL. In this case we are trading with the receive location we set up so we will use "http://localhost/ipbaspx24-cs/AS2server.aspx".
Receipt Signer Cert
This is your trading partner's public certificate. This is used to verify the signature on the MDNs that are returned. In this case this will be the "test.cer" file.
We'll use the same steps as in the receiver to specify this certificate.
Recipient Cert
This is your trading partner's public certificate for encryption. In many cases this is the same certificate that would be specified for Receipt Signer Cert. This will
be used to encrypt outgoing messages. The same steps followed for Receipt Signer Cert will be followed here to specify "test.cer".
Signing Cert
This is the digital id used to sign outgoing messages. We will use the same steps as with the receive location to specify "test.pfx". We must also send the corresponding public
certificate to our trading partner so they can verify the signature on the messages we send.
Finish
At this point all of the necessary properties have been set and we can click ok to close the adapter properties window. The URI of the send port should be AS2://ipbaspx24-cs/AS2server.aspx?AS2From="TestAS2Sender"&AS2To="TestAS2Receiver".
As before we'll set up a corresponding receive location of type File to pick up files from disk that will be sent to our trading partner. We'll call this location testAS2.Send.File and specify a receive folder of C:\testas2\outgoing. We'll use the URI of this receive location to add a filter to the AS2 send port we just created. The filter will be BizTalk.InboundTransportLocation == c:\testas2\outgoing\*.xml.
We are now ready to perform a test. After enabling the testAS2.Send.File and testAS2.Receiver receive locations as well as starting the testAS2.Receive.File and testAS2.Sender send ports we can simply drop a .xml file in C:\testas2\outgoing. You should see this file picked up from the Outgoing folder and once processed appear in the Incoming folder.
Conclusion
This article demonstrates the use of the AS2 adapter in particular, but /n software provides a full set of adapters for connecting to various types of internet servers. The adapter properties are kept to a minimum for simplicity, but we make an effort to provide those properties that are necessary for effective control over configurations.
You may obtain the digital id and certificate used in this tutorial here.
We appreciate your feedback. If you have any questions, comments, or suggestions about this article please contact our support team at support@nsoftware.com.