
Using MCP SDK with Claude Desktop
Requirements: MCP SDK
Introduction
The MCPServer component of the MCP SDK makes it easy to build MCP servers that connect LLMs like Claude to custom resources, data, and code. This article walks through the process of connecting Claude to MCP servers built with MCP SDK, using the MCP Server demo that comes included with the library as an example MCP server.
Before Getting Started with Claude
Before configuring Claude, ensure that the MCP SDK demo is ready to go:
- Install MCP SDK
- Run the MCP Server demo included with MCP SDK to confirm it starts correctly
Once the demo is running, configuring Claude depends on whether HTTPS or stdio should be used as the transport mechanism.
HTTP/S and stdio
MCP SDK and the MCP Server demo support two methods of communicating with LLM clients like Claude, HTTP/S and stdio.
HTTP/S
Claude only supports HTTP communication with MCP Servers if the connection uses SSL (HTTPS) and the server has a CA-signed SSL certificate. MCP SDK does not include a CA-signed certificate, but the MCPServer component can easily be configured to use one.
Alternatively, an SSL proxy like ngrok can be used to host a secure SSL connection that Claude will accept.
stdio
In stdio mode, Claude launches the MCP Server demo as a sub-process and communicates locally over stdin and stdout. Note that the demo must be compiled and run independently first, so that the server executable is created (Claude is configured with the path to this executable).
Configuring Claude for stdio
When using stdio for communication between Claude and the MCP Server, Claude Desktop must be installed so that the client can be configured to launch the MCP Server demo executable.
Step 1: Install Claude Desktop
- Download Claude Desktop
- Create an account and install the desktop application.
Step 2: Edit the Claude Configuration JSON File
Once Claude Desktop is installed, find the configuration file (claude_desktop_config.json) and edit the JSON to add an mcpServers element containing each MCP server and the path to its executable command, like the following:
{
    "mcpServers": {
        "mcpsdk-demo": {
            "command": "C:/Users/myUser/Documents/MCP SDK 2026 Delphi Edition/demos/MCP Server/mcpserver.exe"
        }
    }
}
Noe that the above example should be modified to match the installation directory for MCP SDK and the user under whom the library was installed.
To use a custom MCP server that is not the demo included with MCP SDK, the "command" element should be updated to include the path to the appropriate executable for that server.
Step 3: Restart Claude
Claude's JSON configuration only take effect when the Claude Desktop application is launched, so close Claude Desktop (including terminating the Claude service by using the system tray or Task Manager), then re-launch the application.
If configured correctly, Claude will launch the MCP Server demo automatically upon startup:
Note that since the demo is running as a sub-process of Claude, gracefully quitting the demo requires terminating the Claude process.
Configuring Claude for HTTPS
When using HTTPS to communicate between Claude and the MCP server, either a CA-signed SSL certificate or an SSL proxy is required. This guide will describe the steps for using ngrok as an SSL proxy, but a CA-signed SSL certificate can be configured within the demo UI if available.
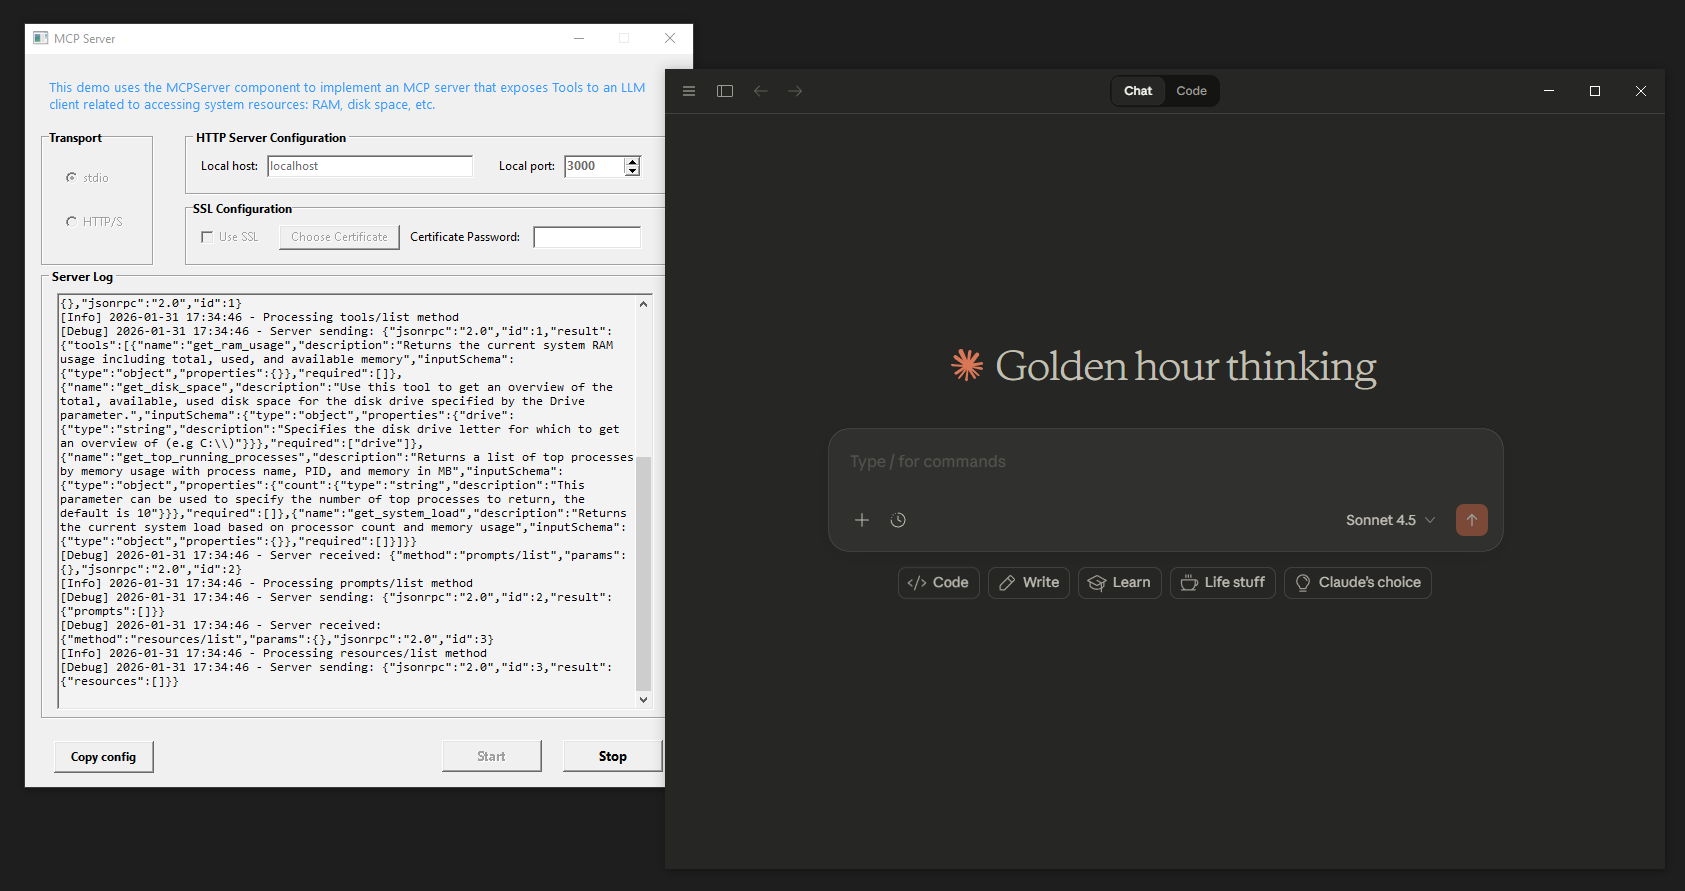
Step 1: Run the MCP Server Demo in HTTP Mode
- Launch the demo
- Toggle 'HTTP/S' as the Transport setting
- Keep 'Use SSL' unchecked and do not configure SSL
- 'Start' the server
The MCP Server demo is now listening at the following URL: http://localhost:3000
Step 2: Use ngrok as an SSL Proxy
- Download ngrok
- In the command line, run the following: ngrok http 3000
- In the resulting ngrok window, find the 'Forwarding' value, e.g.: https://katy-unactionable-ursula.ngrok-free.dev
- This value will be used as the 'URL' in the following steps
Step 3: Enable Developer Mode in Claude
Within Claude's Settings panel, find the Developer setting option and enable it. Without Developer mode enabled, the UI will not show the option to create custom Connectors.
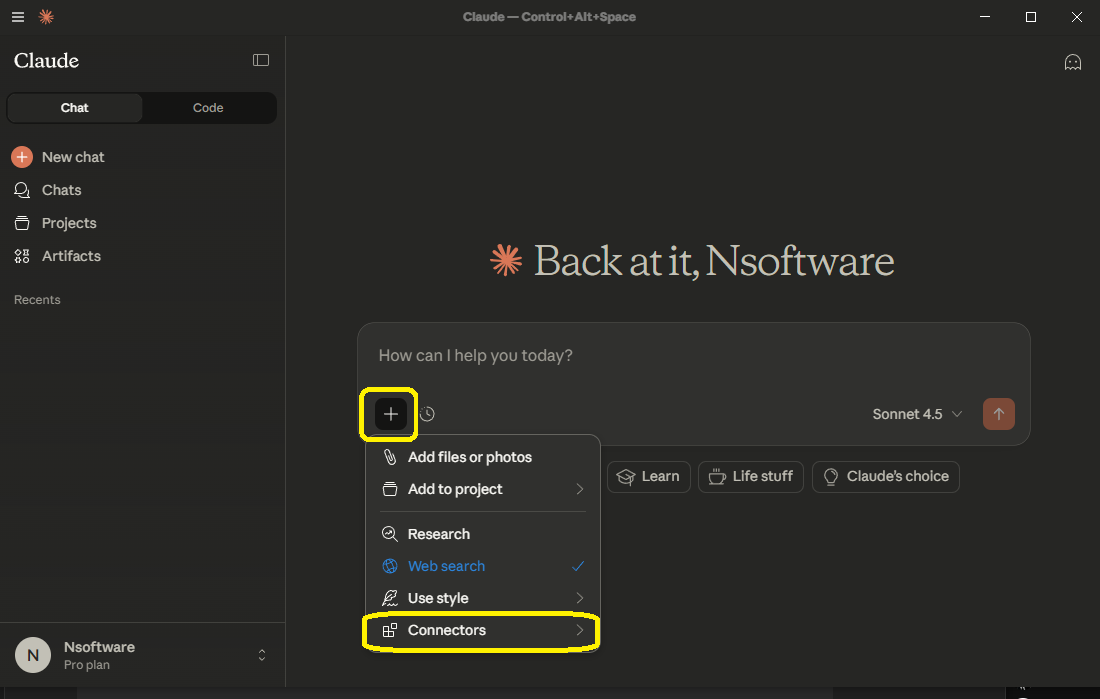
Step 4: Go to Connectors Settings
- As shown below, click the + button under the query text box
- From the dropdown menu, find Connectors -> Manage Connectors
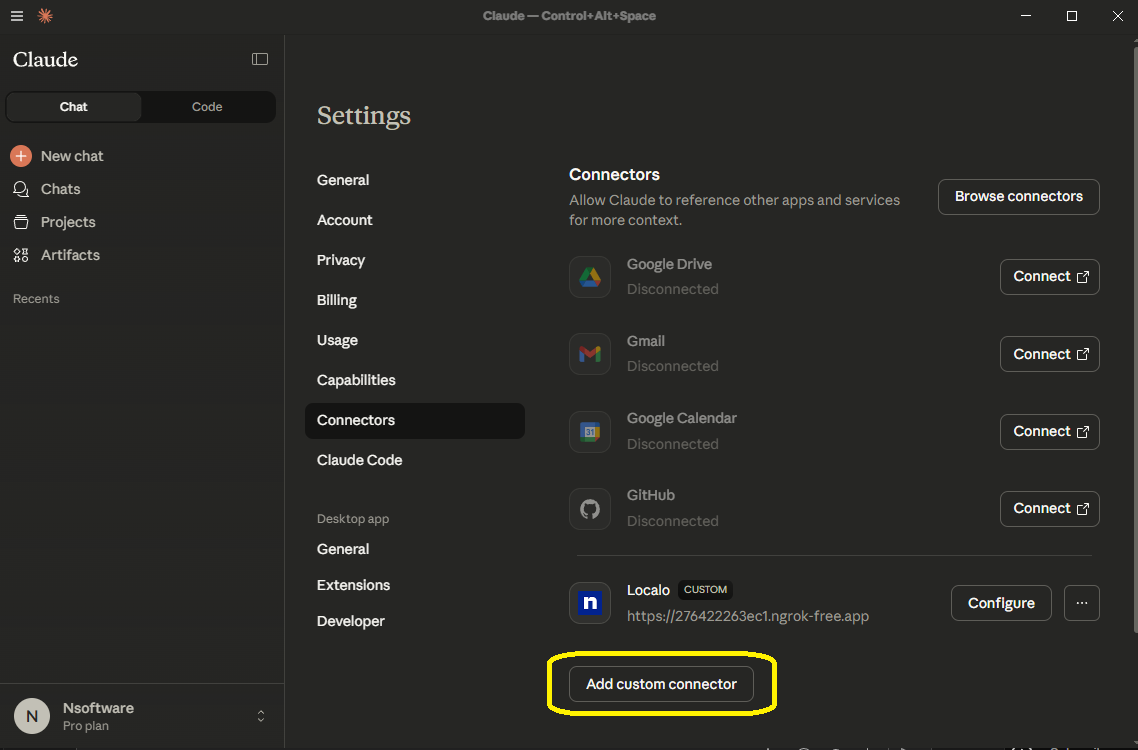
Step 3: Add a new Custom Connector
- Select the Add Custom Connector option within Connector settings
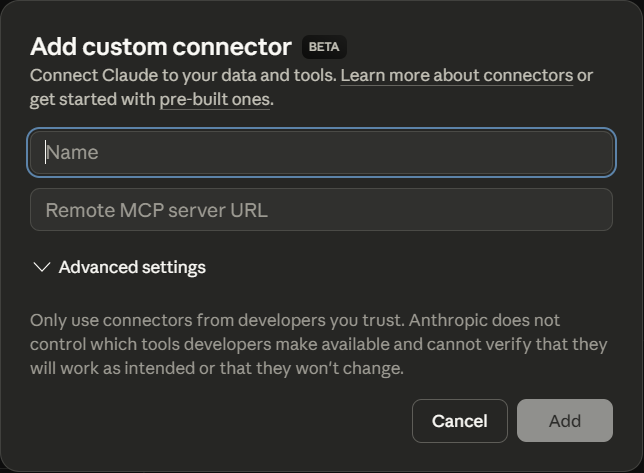
Step 4: Specify the MCP Server URL
- Custom Connectors require a name and a URL where the MCP server (connector) is listening
- Specify any helpful and descriptive name, e.g. "MCP SDK Demo"
- Set the URL to ngrok's 'Forwarding' value from before, e.g.: https://katy-unactionable-ursula.ngrok-free.dev
Step 5: Verifying the Integration
- Your newly named Connector should now appear in the Connectors list in Connector Settings
- Starting a new chat with Claude, you can ask about system processes, RAM usage, and disk space and receive accurate responses
We appreciate your feedback. If you have any questions, comments, or suggestions about this article please contact our support team at support@nsoftware.com.