
SFTP Task for SSIS
| Requirements: | /n software SQL Server SSIS Tasks |
| SQL Server Integration Services |
Introduction
The /n software SQL Server SSIS Tasks consist of a single task library containing individual tasks for Internet communications. Built from the same core codebase as the /n software Adapters for Microsoft BizTalk Server, the SSIS Tasks provide robust enterprise ready Internet connectivity, secure messaging, and file transfer.
This guide will focus specifically on the SFTP task, which is used to communicate with SFTP servers. SFTP (which should not be confused with FTP, FTPS, or FTP over SSH) is the SSH File Transfer Protocol. If you're interested in using SFTP communication in your SSIS package, you're in the right place. Before you continue reading, I recommend that you go ahead and download the product and follow along with me through the tutorial.
Contents
- Task Installation
- Send Task Properties
- Send Task Usage
- Receive Task Properties
- Receive Task Usage
- Using Expressions With The Tasks
- Conclusion
Task Installation
After you run the setup application, all of the necessary files will be installed on your system. If a current version of Visual Studio is installed, as long as the BI tools are present (which should be included with the SSDT installer), the tasks will show up in the SSIS Toolbox. However, if Visual Studio 2012 or older is used, in order for the tasks to be available to you when designing your package you'll need to add them to the toolbox in Visual Studio. Lets do this now by following these steps.
- Open Visual Studio and create a new Integration Services project.
- Expand the toolbox in Visual Studio and right click on the "Control Flow Items" tab then select "Choose Items".
- Since the tasks were installed to the GAC you will see the tasks listed under the "SSIS Control Flow Items" tab of the "Choose Toolbox Items" dialog.
- Check the box next to the tasks you wish to add. For this tutorial we will add "nsoftware SFTPReceive Task" and "nsoftware SFTPSend Task"
- After clicking OK you will see the tasks listed under the "Control Flow Items" tab in the toolbox
Send Task Properties
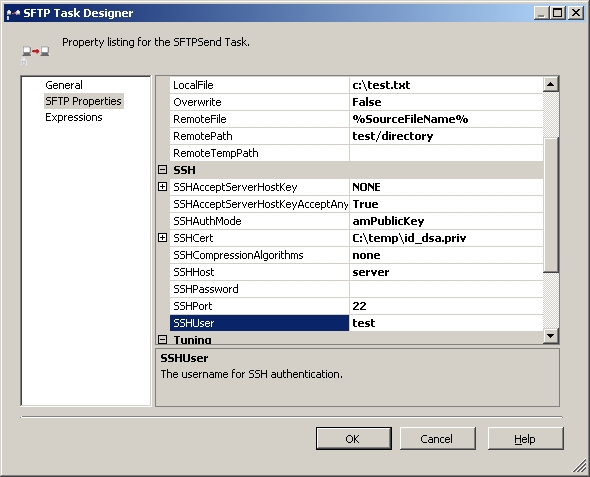
At this point let's go ahead and drag the nsoftware SFTPSend Task from the toolbox onto the Control Flow surface. You'll notice immediately that package validation is failing. This is because some required properties are not yet set. Let us review the available properties, and in the next section we will discuss common settings. At this point you can double click the task on the Control Flow surface to open the SFTP Task Designer. Under the SFTP Properties section you will see:
-
SFTP Properties
The first group of properties are SFTP properties. This is where you will tell the task where on the SFTP server to write the files. All of these properties are fairly self explanatory:
AfterConnect A set of FTP-style commands to be executed immediately after connecting to the SSHHost. The help files lists available commands. AfterPut A set of FTP-style commands to be executed after the upload. The help files lists available commands. Append Whether or not the task should append data to the RemoteFile. BeforePut A set of FTP-style commands to be executed before the upload. The help files lists available commands. LocalFile The LocalFile property is the name of the file or a file mask on the local host to be uploaded to the SFTP server. Overwrite If set to false, an error will occur if a file with the same name already exists on the remote server. If set to true, the file of the same name will be overwritten. RemoteFile The name of the destination file on the remote SFTP server. RemotePath The path of the remote SFTP server to which the Remote File should be uploaded. RemoteTempPath A temporary directory on the remote SFTP server where files will be stored during the upload process. When the upload is complete, the temporary file(s) will be moved to Remote Path. If this property is left blank, files will be uploaded straight to Remote Path.
-
SSH Properties
The SSH properties specify where and how to connect for the SFTP connection.
SSHAcceptServerHostKey Instructs the task to accept the server host key that matches the supplied key. Clicking the ellipses will open the certificate selector dialog to load the public key. SSHAcceptServerHostKeyAcceptAny Instructs the task to unconditionally accept the server's host key if set to True. This is useful for testing. SSHAuthMode The type of authentication used by the task (public key, password, keyboard interactive, and multi-factor authentication are all supported). SSHCert This property shows the subject of the certificate that is currently specified for public key authentication. Clicking the ellipses of this property will open the certificate selector dialog where you will be able to easily load your certificate. With the certificate selector dialog you can load certificates from the User and Machine stores, as well as from PFX or PEM files. SSHCompressionAlgorithm Can be either "none" (default) or "zlib". SSHHost The internet address of the SSH host. SSHPassword The password to use when connecting to the SSH host. SSHPort The port on the SSH host on which to connect. SSHUser The user id to use when connecting to the SSH host. -
Tuning Properties
Firewall This may be expanded to configure the firewall type, host, port, user, and password if needed. LogMode This may be set to different values (such as lmVersbose) to assist in debugging efforts. PersistentConnection If set to True the connection to the server will be left open after the task has performed it's operation. Other SFTP tasks that also have this value set to True may then use the same connection to perform other tasks. Other This allows you to specify additional configuration settings in the format configname1=value1. See the Configuration section of the documentation for a list of supported settings.
It is very important to understand these SSH properties, since a complete understanding will help ensure the security of your transactions. To that end, I will go into a more complete discussion of each of these properties.
The "SSHCert" property will allow you to specify a certificate in a variety of forms as mentioned above. The design of the certificate selector dialog is intended to allow you to easily select a certificate for public key authentication. If you are specifying a PEM File, please note that you must specify an SSH2 RSA private key.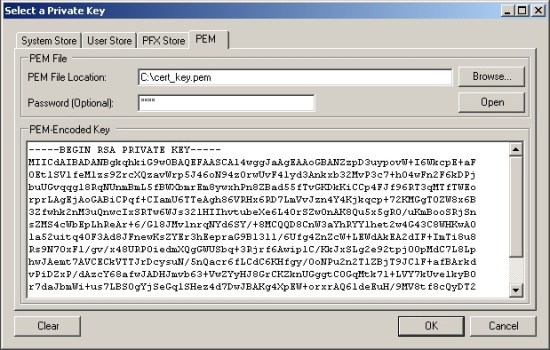
The "SSHAcceptServerHostKey" setting tells the task what host key to accept during
the security handshaking procedure of the connection to the remote server. If the value specified here does
not match the key that the server presents, the connection will be terminated with an error.
This property acts like the SSHCert property in that clicking the ellipses will open the certificate selector dialog where you may
select a certificate.
As mentioned above you may also set the SSHAcceptServerHostKeyAcceptAny property to True to always accept the
server's host key.
If you want to use the hex encoded 16-byte MD5 fingerprint, this can be done through the use of the Other property in the Tuning section. You would give the Other property a value like so: SSHAcceptServerHostKeyFingerprint=0a:1b:2c:3d
The "SSHAuthMode" specifies which form of authentication you would like to perform when connecting to the SSH server. The task supports regular "User/Password", public key, or keyboard interactive authentication. Multi-Factor authentication may be selected to use a combination of these three authentication mechanisms. If you choose to use public key authentication, you'll also need to set the "SSH Cert" property to point the task to the key pair it should use. This article is not meant to explain how public key authentication works, however if you would like to use this form of authentication you should generate a key pair on your own computer, and copy the public key to the SSHServer. Then when you connect to the server, you can point the task to your private key to authenticate. The "SSHCert" property is only used if you choose to use public key authentication.
The "SSHCompressionAlgorithm" property should be set to "ZLIB" if you'd like to implement ZLIB compression in your SSH communications. Use of compression will likely depend on your trading partner's requirements, but it's entirely optional. Generally, it's a good idea to compress large documents but inefficient to use it for small documents.
The "SSHHost", "SSHPort", "SSHUser" and "SSHPassword" settings are all self explanatory - just specify the server you'd like to connect to, on what port (the default is port 22), and the user and password to use to connect with. Note that if you use public key authentication, you will still need to specify an "SSHUser", but the "SSHPassword" will be ignored.
Send Task Usage
In order to configure a send task to upload files from the LocalFile to my remote SFTP server, I only need to set a few of these properties:
- For the SFTP properties, I'll set the "RemoteFile" and the "RemotePath" to the name of the specific folder location on the remote server where I want to store the files (in my case "test/directory").
- Note: If you wish to upload multiple files, then you will need to set LocalFile to a file mask (i.e.: c:\*.txt) and RemoteFile to %SourceFileName%.
- For the SSH properties, I'll start by using the value "True" for the "SSHAcceptServerHostKeyAcceptAny" property, just for testing. Later I'll change this to the correct value as documented above. I'll use public key authentication since it is generally considered to be more secure, so I'll set the "SSHAuthMode" to "amPublicKey". I'll get my certificate from a PEM file, so I'll use the certificate selector dialog from the "SSHCert" to specify the PEM File. Then all that's left is to set the "SSHHost" and "SSHUser" and I'm ready to go.
Receive Task Properties
Another common situation in which the SFTP task might be used is one where files that are dropped in a folder on a remote SFTP folder need to be retrieved so that these remote files can be used locally or automatically transferred elsewhere. In this situation, a receive task would be configured to connect to a remote server and retrieve the files.
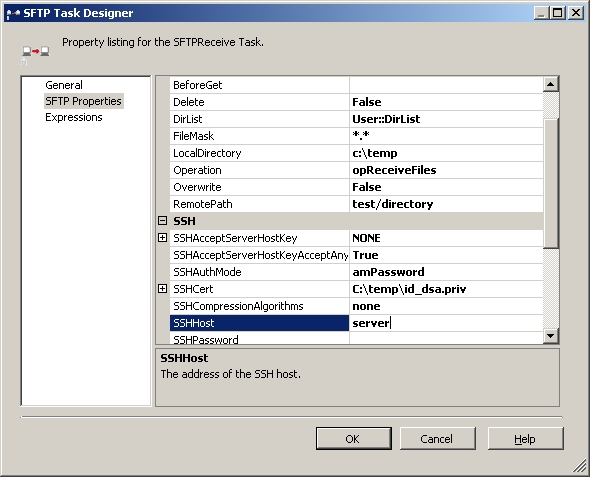
After you add a new SFTPReceive task, you can double click the task like you did for the send task to edit the properties. Many of these properties are the same as those documented above in the Send Port section. Here I will only document the properties specific to using the SFTPReceive task, since many of the properties have the same meaning as in the above description of the SFTPSend task.
- SFTP Properties
The first group of properties are SFTP properties. This is where you will tell the task where on the SFTP server to retrieve the files. Again, these properties are fairly self explanatory:
Delete Whether or not the remote file should be deleted after download. DirList The collection is made up of entries for each listing in the current directory, specified by the RemotePath property. The variable is in the form of a DataTable. The table's rows represent a directory listing, and the columns represent a different property of the listing. The columns of the DataTable are listed below: - (0) FileName - The name of the file being listed.
- (1) FileSize - The size of the file.
- (2) FileTime - The creation date of the file.
- (3) IsDir - Denotes whether the listing is a directory or a file.
- (4) Listing - The filename, and extended file information.
FileMask Indicates the type of files to download from the FTP server (for example, "*.txt"). Local Directory This may be set to a directory to which all files will be downloaded. Operation This specifies the action of the task. Possible values are opListDirectory, opReceiveFiles (default), and opDeleteFiles. Overwrite If set to false, an error will occur if a file with the same name already exists on the file system. If set to true, the file of the same name will be overwritten. - SSH Properties
The task has the same SSH properties in a receive task as in a send task.
Receive Task Usage
In order to configure a receive task to download files from the remote SFTP server, again I only need to set a few of these properties:
- For the SFTP properties, I'll set "FileMask" to *.* (because I want to get all the files), and "LocalDirectory" to "c:\temp" (all received files will be written to this location).
- For the SSH properties, I'll use the same settings as in the above send port example since I am connecting to the same server.
- I've also set the DirList property to a user variable of type object that I created. In my package I will use a Foreach Loop (with a Foreach ADO Enumerator) to iterate over the data table and log the names of the files I've downloaded.
Using Expressions With The Tasks
You may use the Task Designer to specify an expression. For instance:
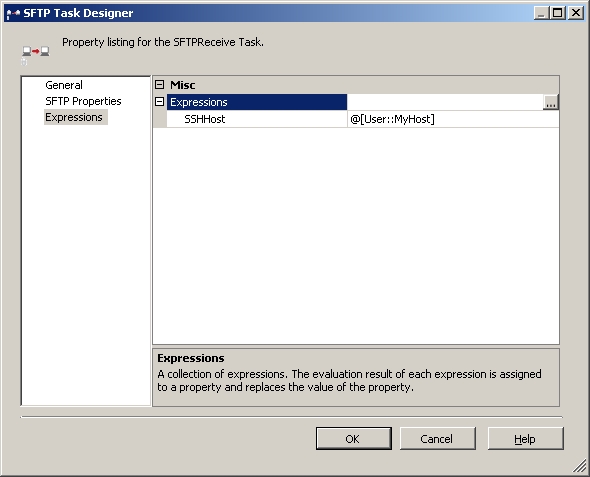
Alternatively, you may point the property to a user variable by setting the property value as "%User::MyVariable%". This is especially helpful
for the password properties which are marked as sensitive and will not show up when creating an expression from the Task Designer. For information on how to
set a certificate by using expressions please see KB Entry 03070801.
Note that if you specify an expression for a required property you will need to set Delay Validation for the task to True.
Conclusion
This article demonstrates the ease of use of the SFTP task in particular, but /n software provides a full set of tasks for connecting to various types of Internet servers. The task properties are kept to a minimum for simplicity, but we make an effort to provide those properties that are necessary for effective control over configurations.
We appreciate your feedback. If you have any questions, comments, or suggestions about this article please contact our support team at support@nsoftware.com.