
Getting Started With SFTP Server
Requirements: SFTP Server
Introduction
SFTP Server is an easy-to-use solution for managing the server-side of secure file transfer. This guide will focus on the simple configuration steps needed to start the server and the authentication mechanisms supported by the server.
Contents
Setting up SFTP Server
Server Settings
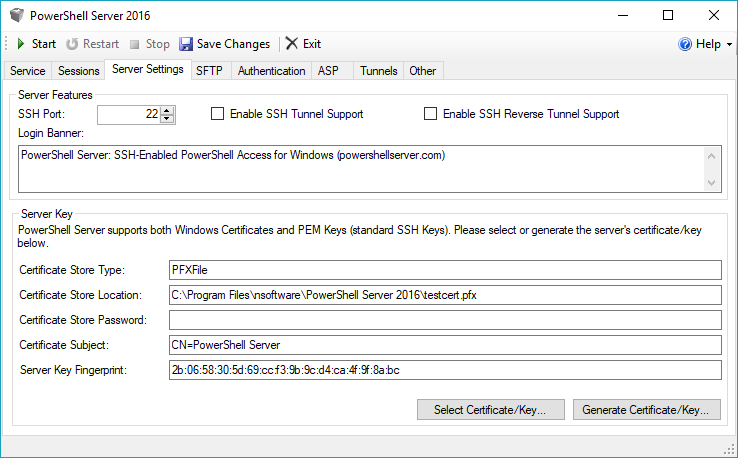
The first time SFTP Server is run, first switch to the Server Settings tab to select the X.509 Digital Certificate to be used by the server to protect the SSH connections. By default, the setup will install and configure the application to use the included test certificate, testcert.pfx. Alternatively, a previously generated certificate can be selected or a new one generated.
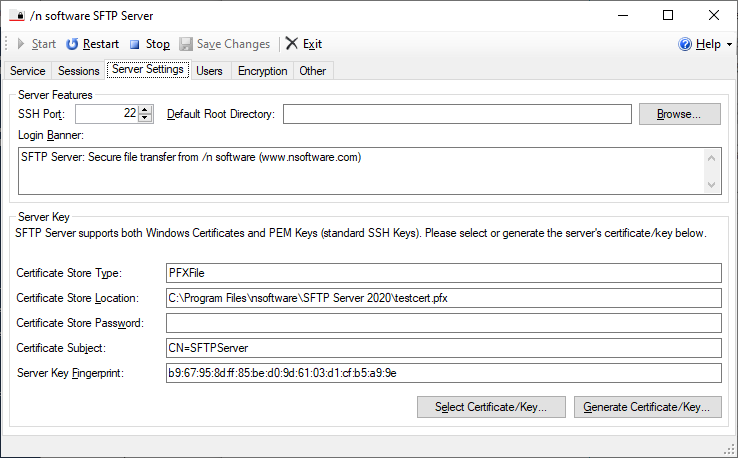
The default root directory is optional. When creating users you will have the option to specify a user-specific directory or use the default defined here.
Running as a Windows Service
If the Run as a Windows Service option in the Service tab is NOT selected, the SSH listener will be run in-process inside the SFTP Server application. This means that to be able to connect to the server, a user must be logged in and the SFTP Server application must be running (and the listener started). This mode of operation can be very convenient for desktop use.
However, for servers, it is better to enable the Run as a Windows Service option. In this mode of operation, the SSH listener (and any connected SFTP sessions) are not run on the desktop. Instead, a Windows Service is configured, which can run all the time, even if no users are logged on. When this option is enabled, the Start/Restart/Stop buttons in the SFTP user interface actually control the Windows Service.
The Windows Service can also be controlled from the command line by specifying the servicestart or servicestop command line parameters. For example, to start the service:
SFTPServer.exe /servicestart
And to stop the service:
SFTPServer.exe /servicestop
Starting the Server
Once the desired options have been configured, press the Save Changes button in the toolbar to save the changes. At this point, the server is ready to start and begin listening for SSH connections. The Start, Restart and Stop buttons can be used to control whether the server is listening or not.
User Management
The Users tab can be used to configure access for virtual users or Windows groups.
Virtual Users
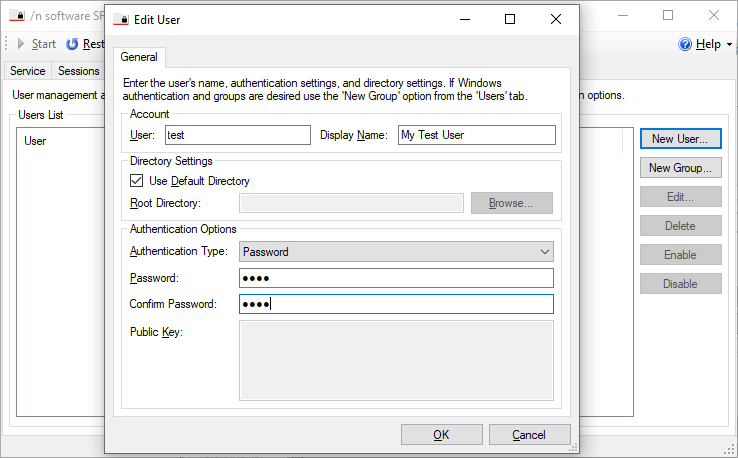
Virtual users are defined only within the application. Click the New User... button to create a new virtual user. Within the dialog you can specify the credentials for the user (password or public key) as well as the root directory for the user. SFTP Server supports both Password and Public Key authentication for virtual users.
Password Authentication
Set the Password field to the password used to authorize the user when connecting via password authentication. If left empty, Password authentication will be disabled for the user.
Public Key Authentication
Set the Public Key field to a list of authorized public keys for this user. During public key authentication, the server will validate the signature presented by the client against the keys stored in this field. If left empty, Public Key authentication will be disabled for the user. The keys should be in SSH public key format according to RFC 4253. For example: ssh-rsa AAAAB3NzaC1yc2EA...rPFBe7Pnc= rsa-key-20110822
Multi-factor Authentication
If Multi-factor authentication is enabled, connections to the server must authenticate by using a multi-method authentication sequence combining Password authentication and Public Key authentication. The server will return partial success if the authentication request was successful and will only authorize a user after both stages of authentication are completed successfully.
Windows Groups
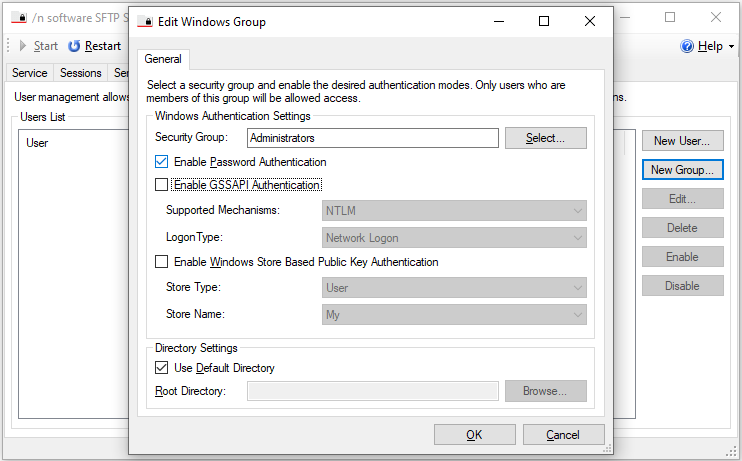
Windows groups may also be used for authentication. When selected, the user will authenticate with their Windows credentials. Click the New Group... button to select a security group that is permitted access. Within this dialog you may set the root directory for the group and optionally specify the supported athentication methods (password, NTLM or Kerberos).
Password Authentication
Clients connecting to the server need to provide a username and password combination. The credentials are then verified using Windows Authentication mechanisms to make sure they match a valid local account on the server or on a domain trusted by it.
Connecting clients are authorized by checking membership of the specified user in a Security Group. The local/domain Security Group used for authorization can be selected under the Connection tab.
GSSAPI Authentication (NTLM/Kerberos)
NTLM or Kerberos authentication can be enabled by checking Enable GSSAPI Authentication under the Authentication tab and choosing the desired Supported Mechanisms.
Note that when using Kerberos as an authentication mechanism, it is recommended that SFTP Server be run as a service. When not running as a service and instead running under a user account, the default SPN (Service Principal Name) format of host/machine@domain used may result in errors. In that case, a new SPN should be registered (for instance ssh/machine) with the domain controller, and the KerberosSPN registry setting for SFTP Server must be set. Additionally any connecting SSH client will need to be configured to use the newly defined SPN.
Additional Information
Once the server is configured and clients can authenticate, files can be transferred freely. Additional configuration information is available in the SFTP Server online documentation.
We appreciate your feedback. If you have any questions, comments, or suggestions about this article please contact our support team at support@nsoftware.com.